Linking Wizard
Overview
The latest update in Data Control Tower (DCT) 12.0.0 marks a significant enhancement in data virtualization capabilities. This version introduces the innovative feature of creating a dSource, a dynamic source object that facilitates efficient data management and synchronization.
As of this release, DCT 12.0.0 supports the integration of two key types of database sources:
Oracle-based sources
MSSQL-based sources
Limitations in MSSQL dSource linking
The ability to link a dSource from backups managed by third-party tools like NetBackup or CommVault is not supported for MSSQL databases as of yet. Users can still create dSources from live MSSQL databases.
This is a known limitation and may be addressed in future updates to expand the versatility and applicability of the dSource feature in diverse data management scenarios.
Prerequisites
To utilize the dSource creation feature effectively in DCT 12.0.0, certain prerequisites must be met:
Continuous Data Engine registration: A prerequisite for dSource integration is having a Continuous Data Engine already registered to a DCT instance. This setup is crucial for enabling the core functionalities of data virtualization and synchronization.
Availability of eligible sources: It is necessary to have access to eligible database sources that can be linked as a dSource. These sources should not already be functioning as a dSource, to avoid redundancy and ensure optimal utilization of the new feature.
Using the Linking Wizard
This new wizard can be launched from the dSource list page, giving the user the ability to create a dSource from DCT. The steps are outlined below:
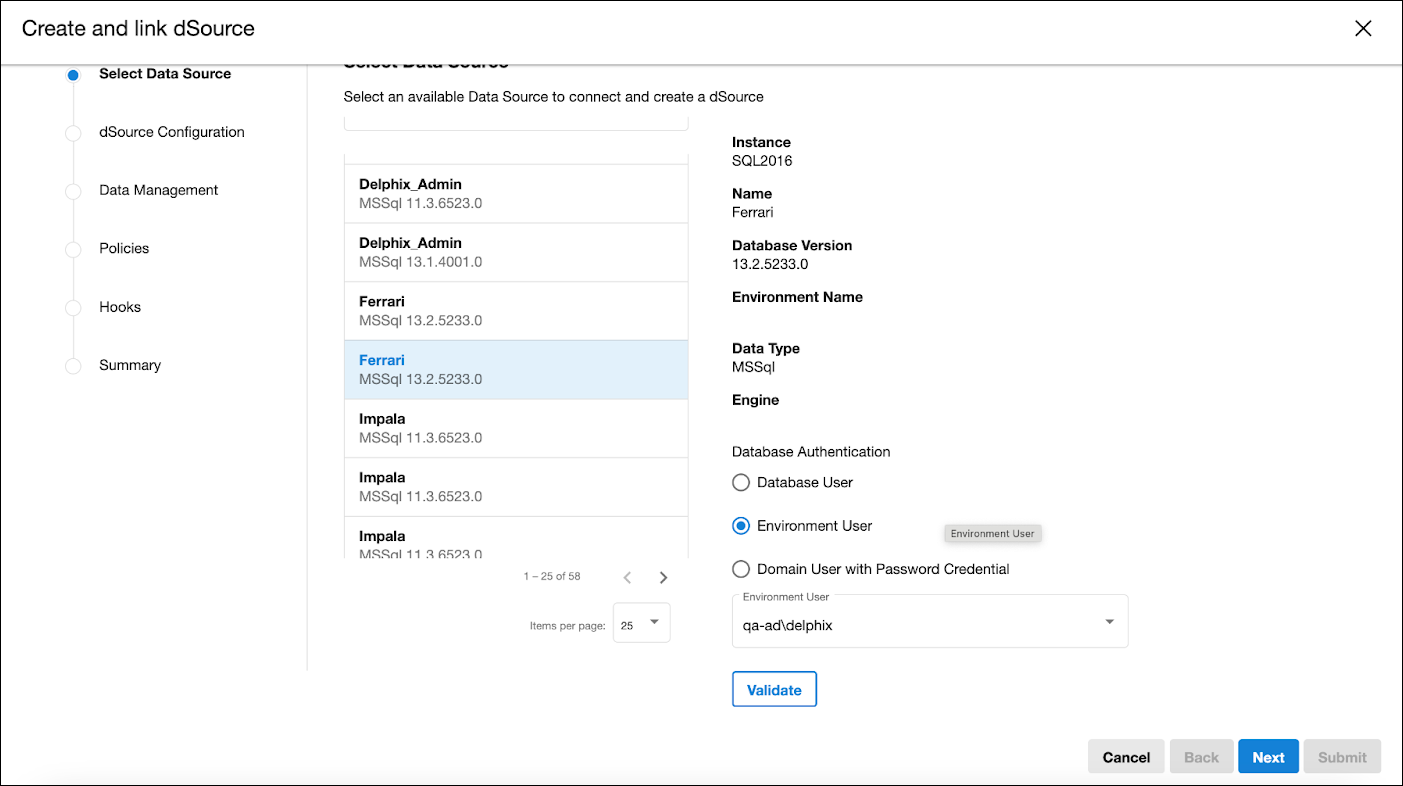
1. Select Data Source step: Navigate an alphabetically sorted list of data sources, or utilize the search function and pagination to locate and choose the preferred source.
Upon selecting a source, essential details such as the Instance, Environment Name, and Engine Name are displayed on the right-hand side of the screen. Database Authentication will be required.
To that point, a crucial part of this step includes a database connectivity check. The Validate button verifies your connection, ensuring a secure and authenticated progression to the next stages.
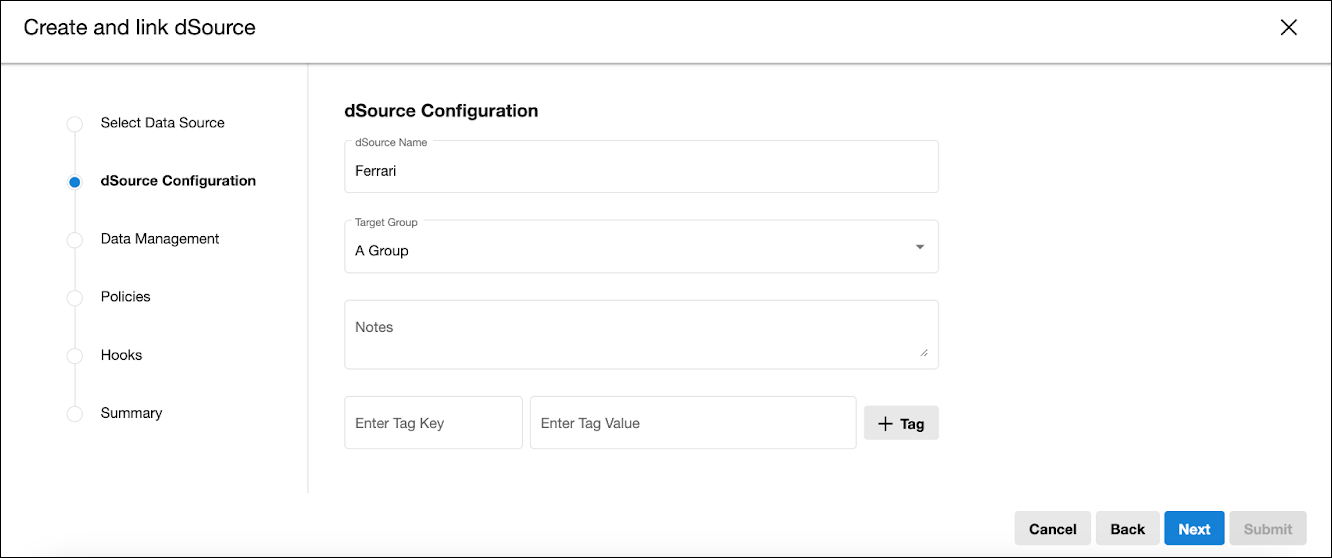
2. dSource Configuration step: Name your dSource here. By default, the dSource name mirrors the name of the source, but it can be modified. Choose the Target Group within the engine to which the new dSource will be added. Add Notes, and a Tag Key and Tag Value pair, if needed.
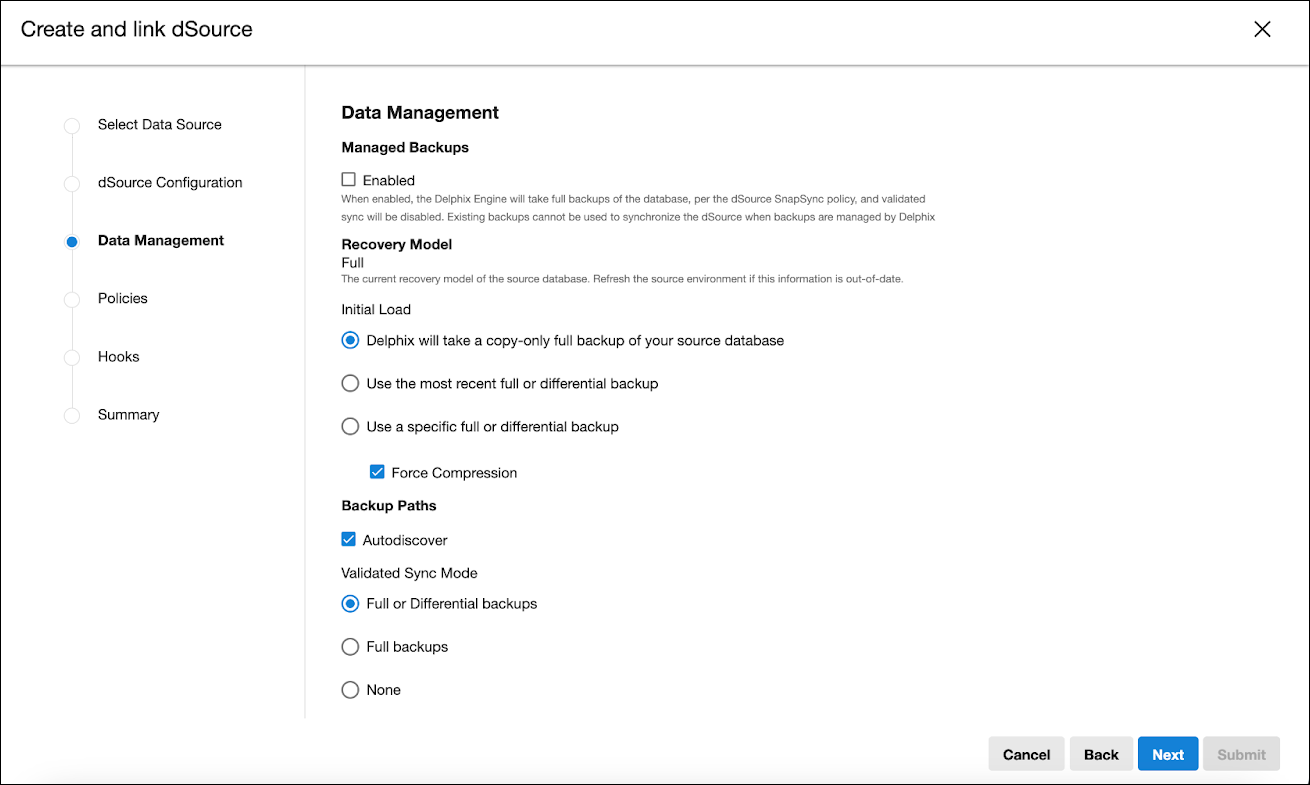
3. Data Management step: The step contains various dSource configurations for optimal data management. The wizard fetches and pre-populates the default values for various data fields, saving you time and reducing manual entry errors.
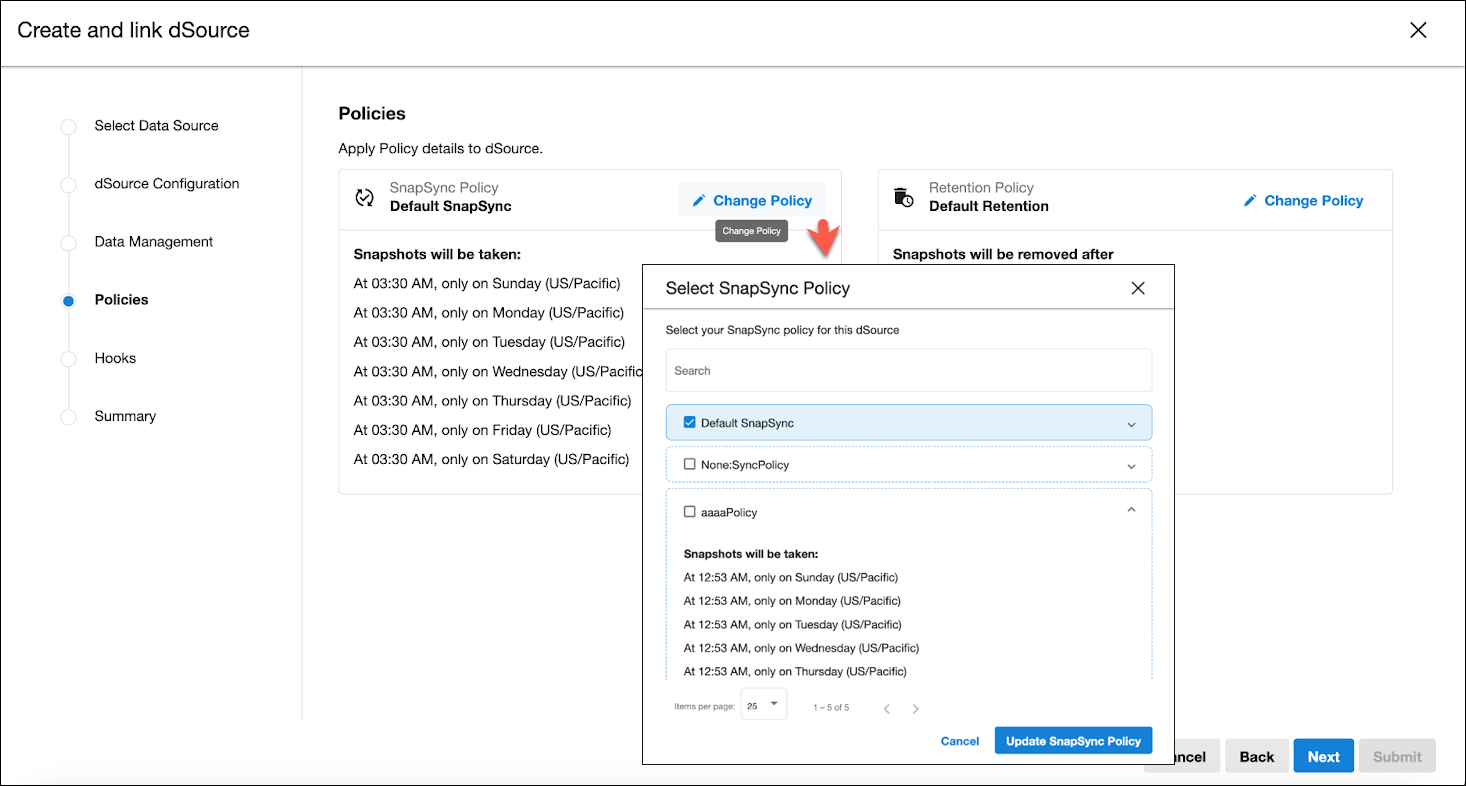
4. Policies step: Tailor the SnapSync and Retention policies according to your requirements. Default policies are selected initially, but these settings can be modified through the Select Policy dialog.
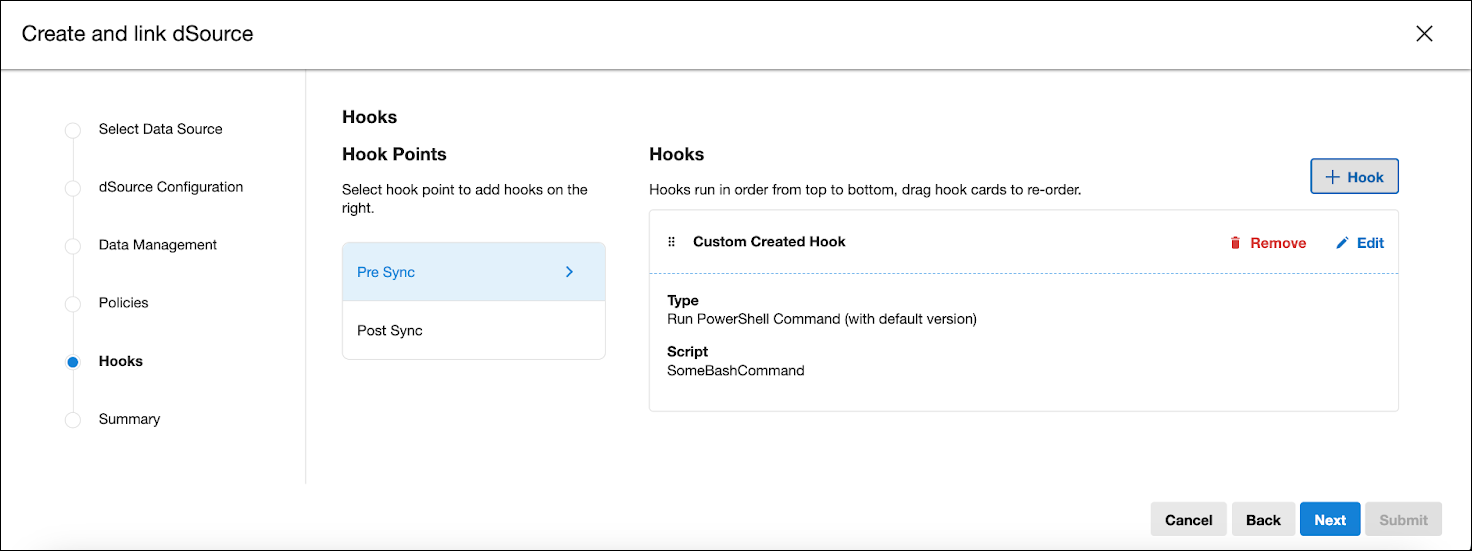
5. Hooks step: Enhance the dSource with custom created Hooks. Use the + Hook button to define the scripts that will execute at various stages of the process, offering greater control and customization over the dSource creation workflow.
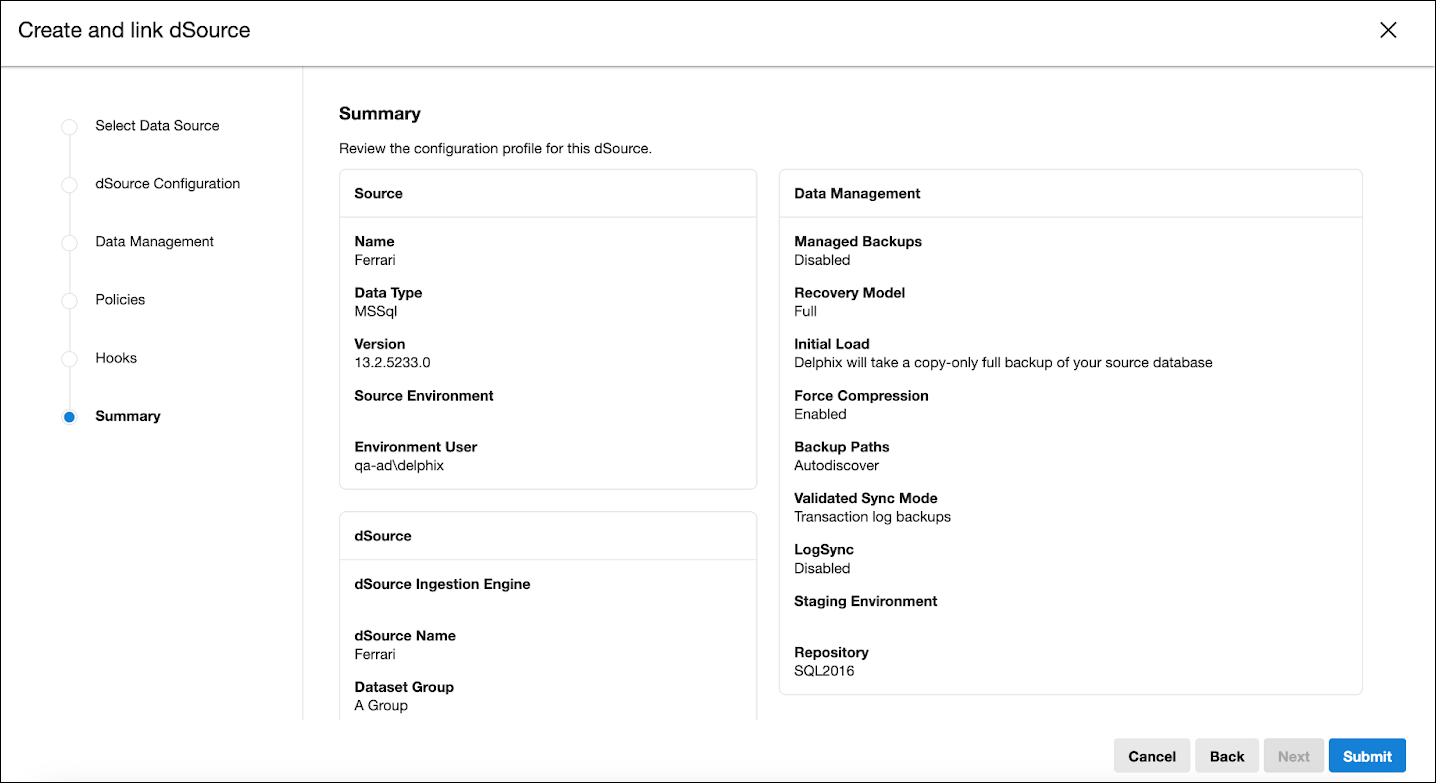
6. Summary step: Before finalizing, a comprehensive summary of all your configurations is presented. This overview allows you to review and confirm that every detail aligns with the intended setup, ensuring accuracy and completeness. Submit the configuration to finish linking your database.