
Infrastructure connection wizard
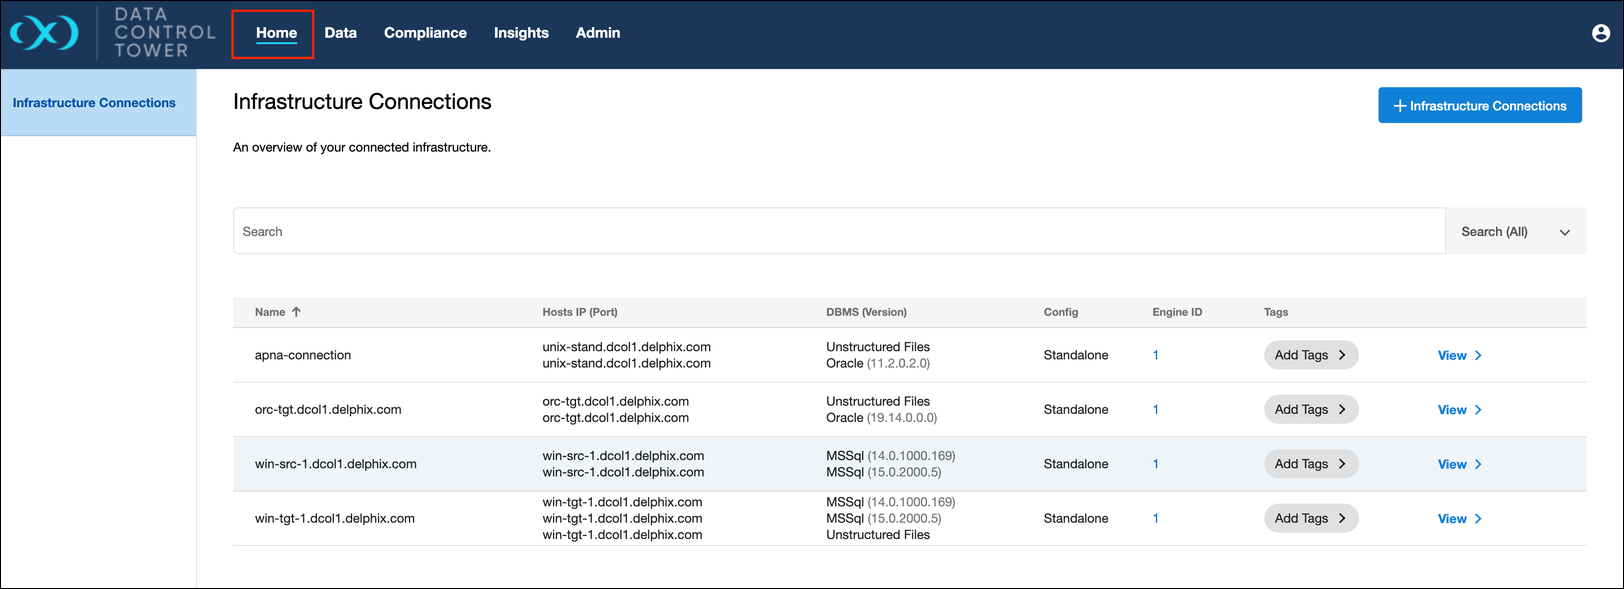
In the DCT interface, select the Home tab on the top navigation bar to see the Infrastructure Connections landing view, which hosts the list of connections. In DCT versions before 9.0.0, these connections were listed under the Environments section of the Data tab. Infrastructure Connections are the DCT equivalent of an environment. The + Infrastructure Connections button will launch the wizard.
The following connections are available:
UNIX environment
Standalone/Cluster
Windows environment
Source/Target
Standalone/Cluster
Infrastructure connection wizard steps
Connection Name
Enter the Connection Name in the corresponding field and select the Associated Engine from the dropdown.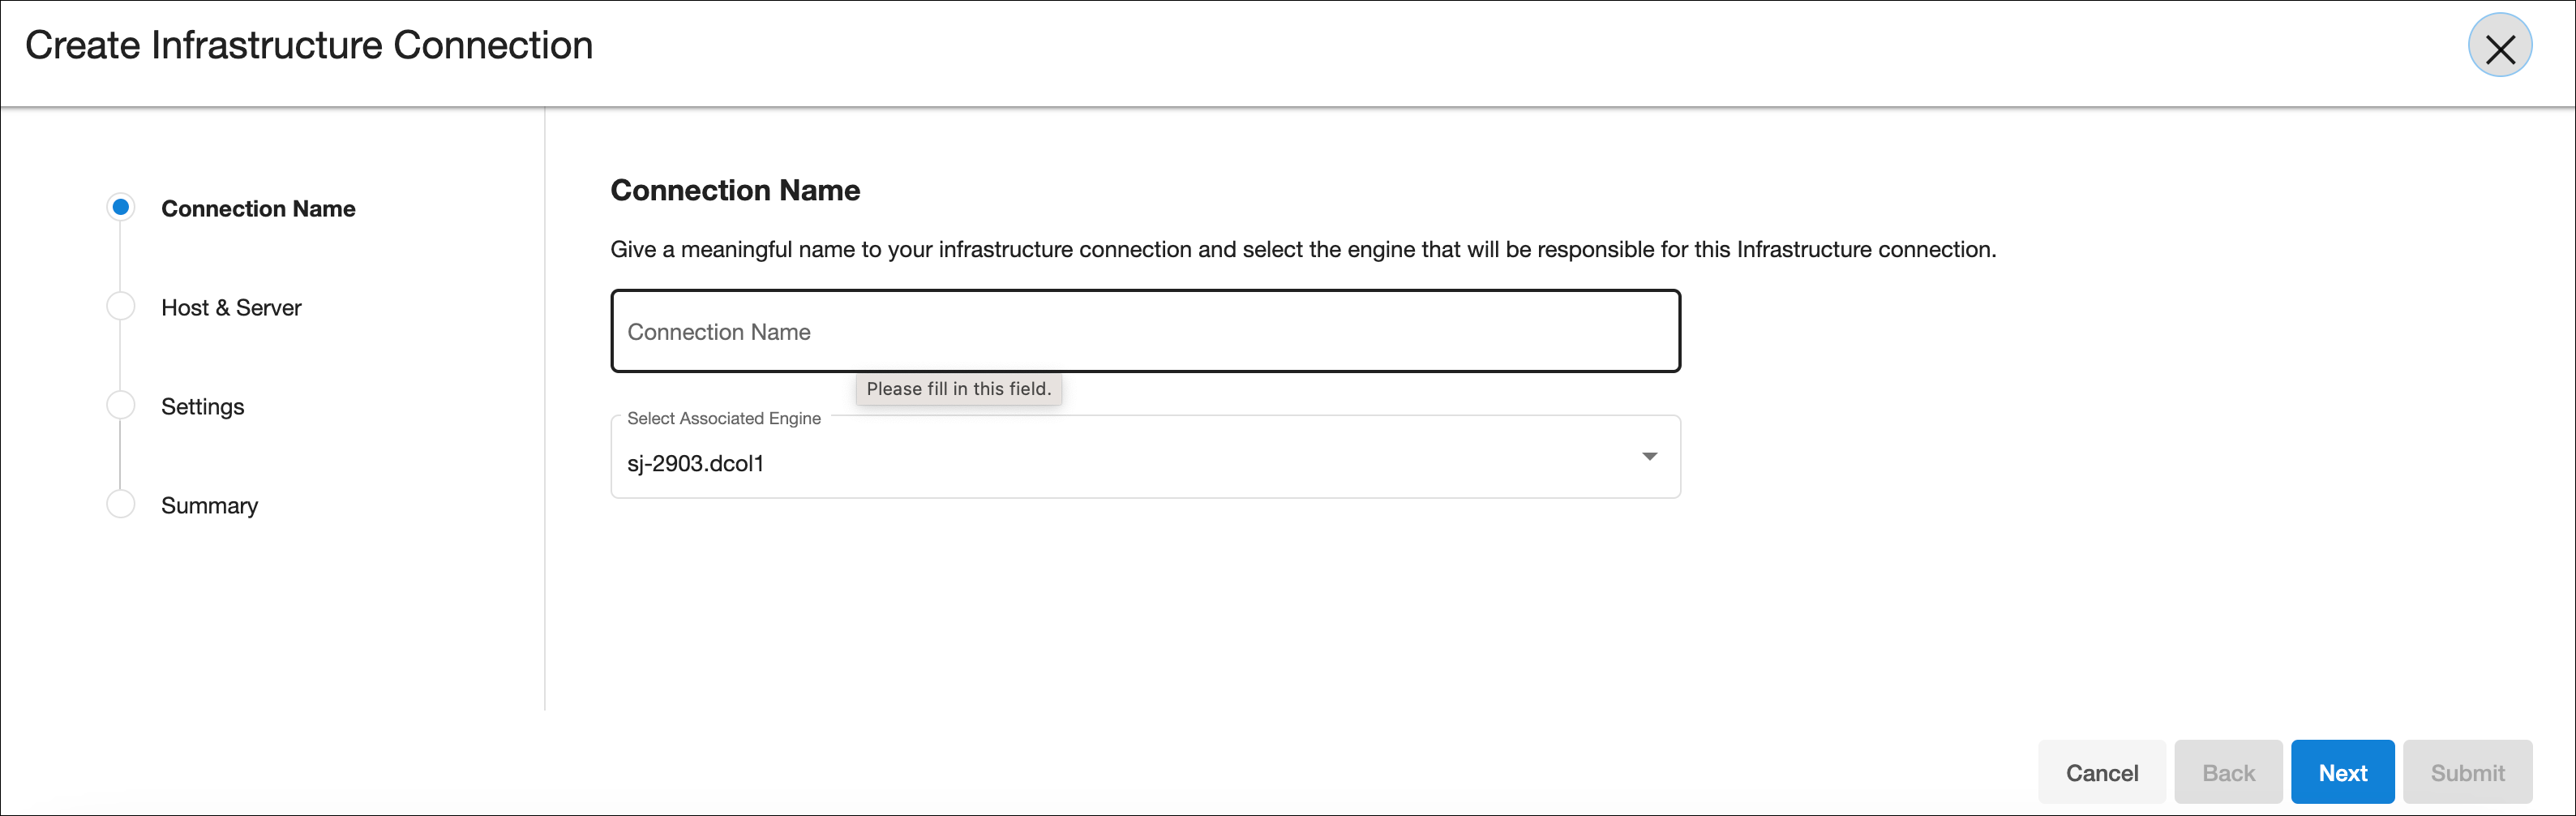
Host & Server
Select the Host OS, Server Type, and Host Type (applicable to Windows).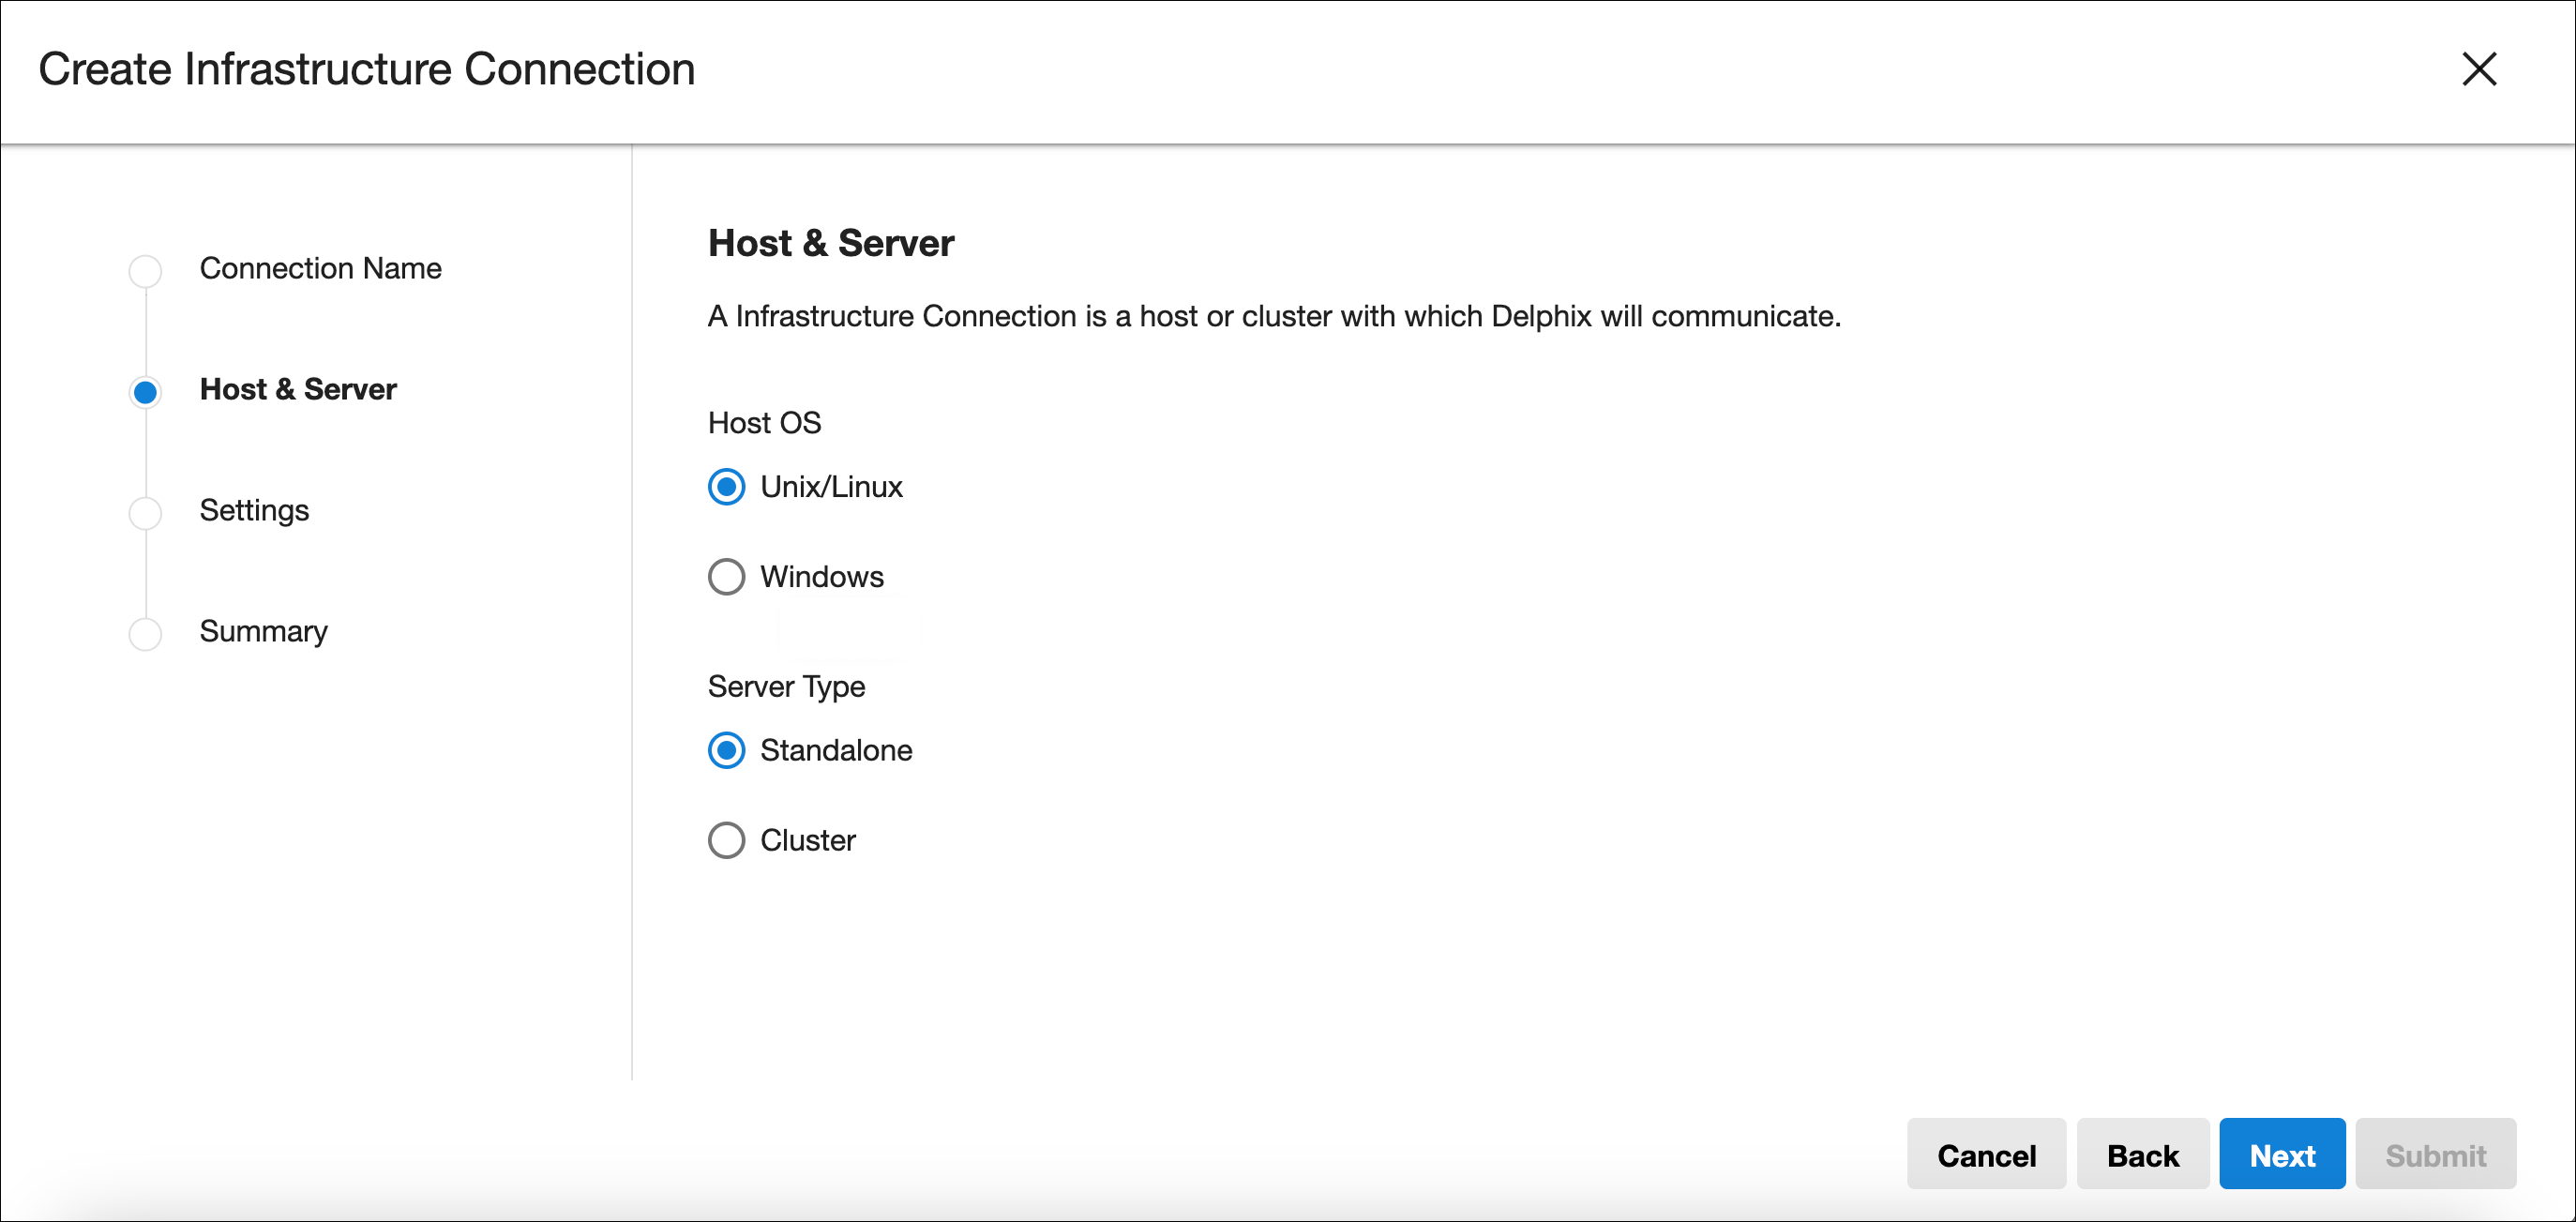
Unix
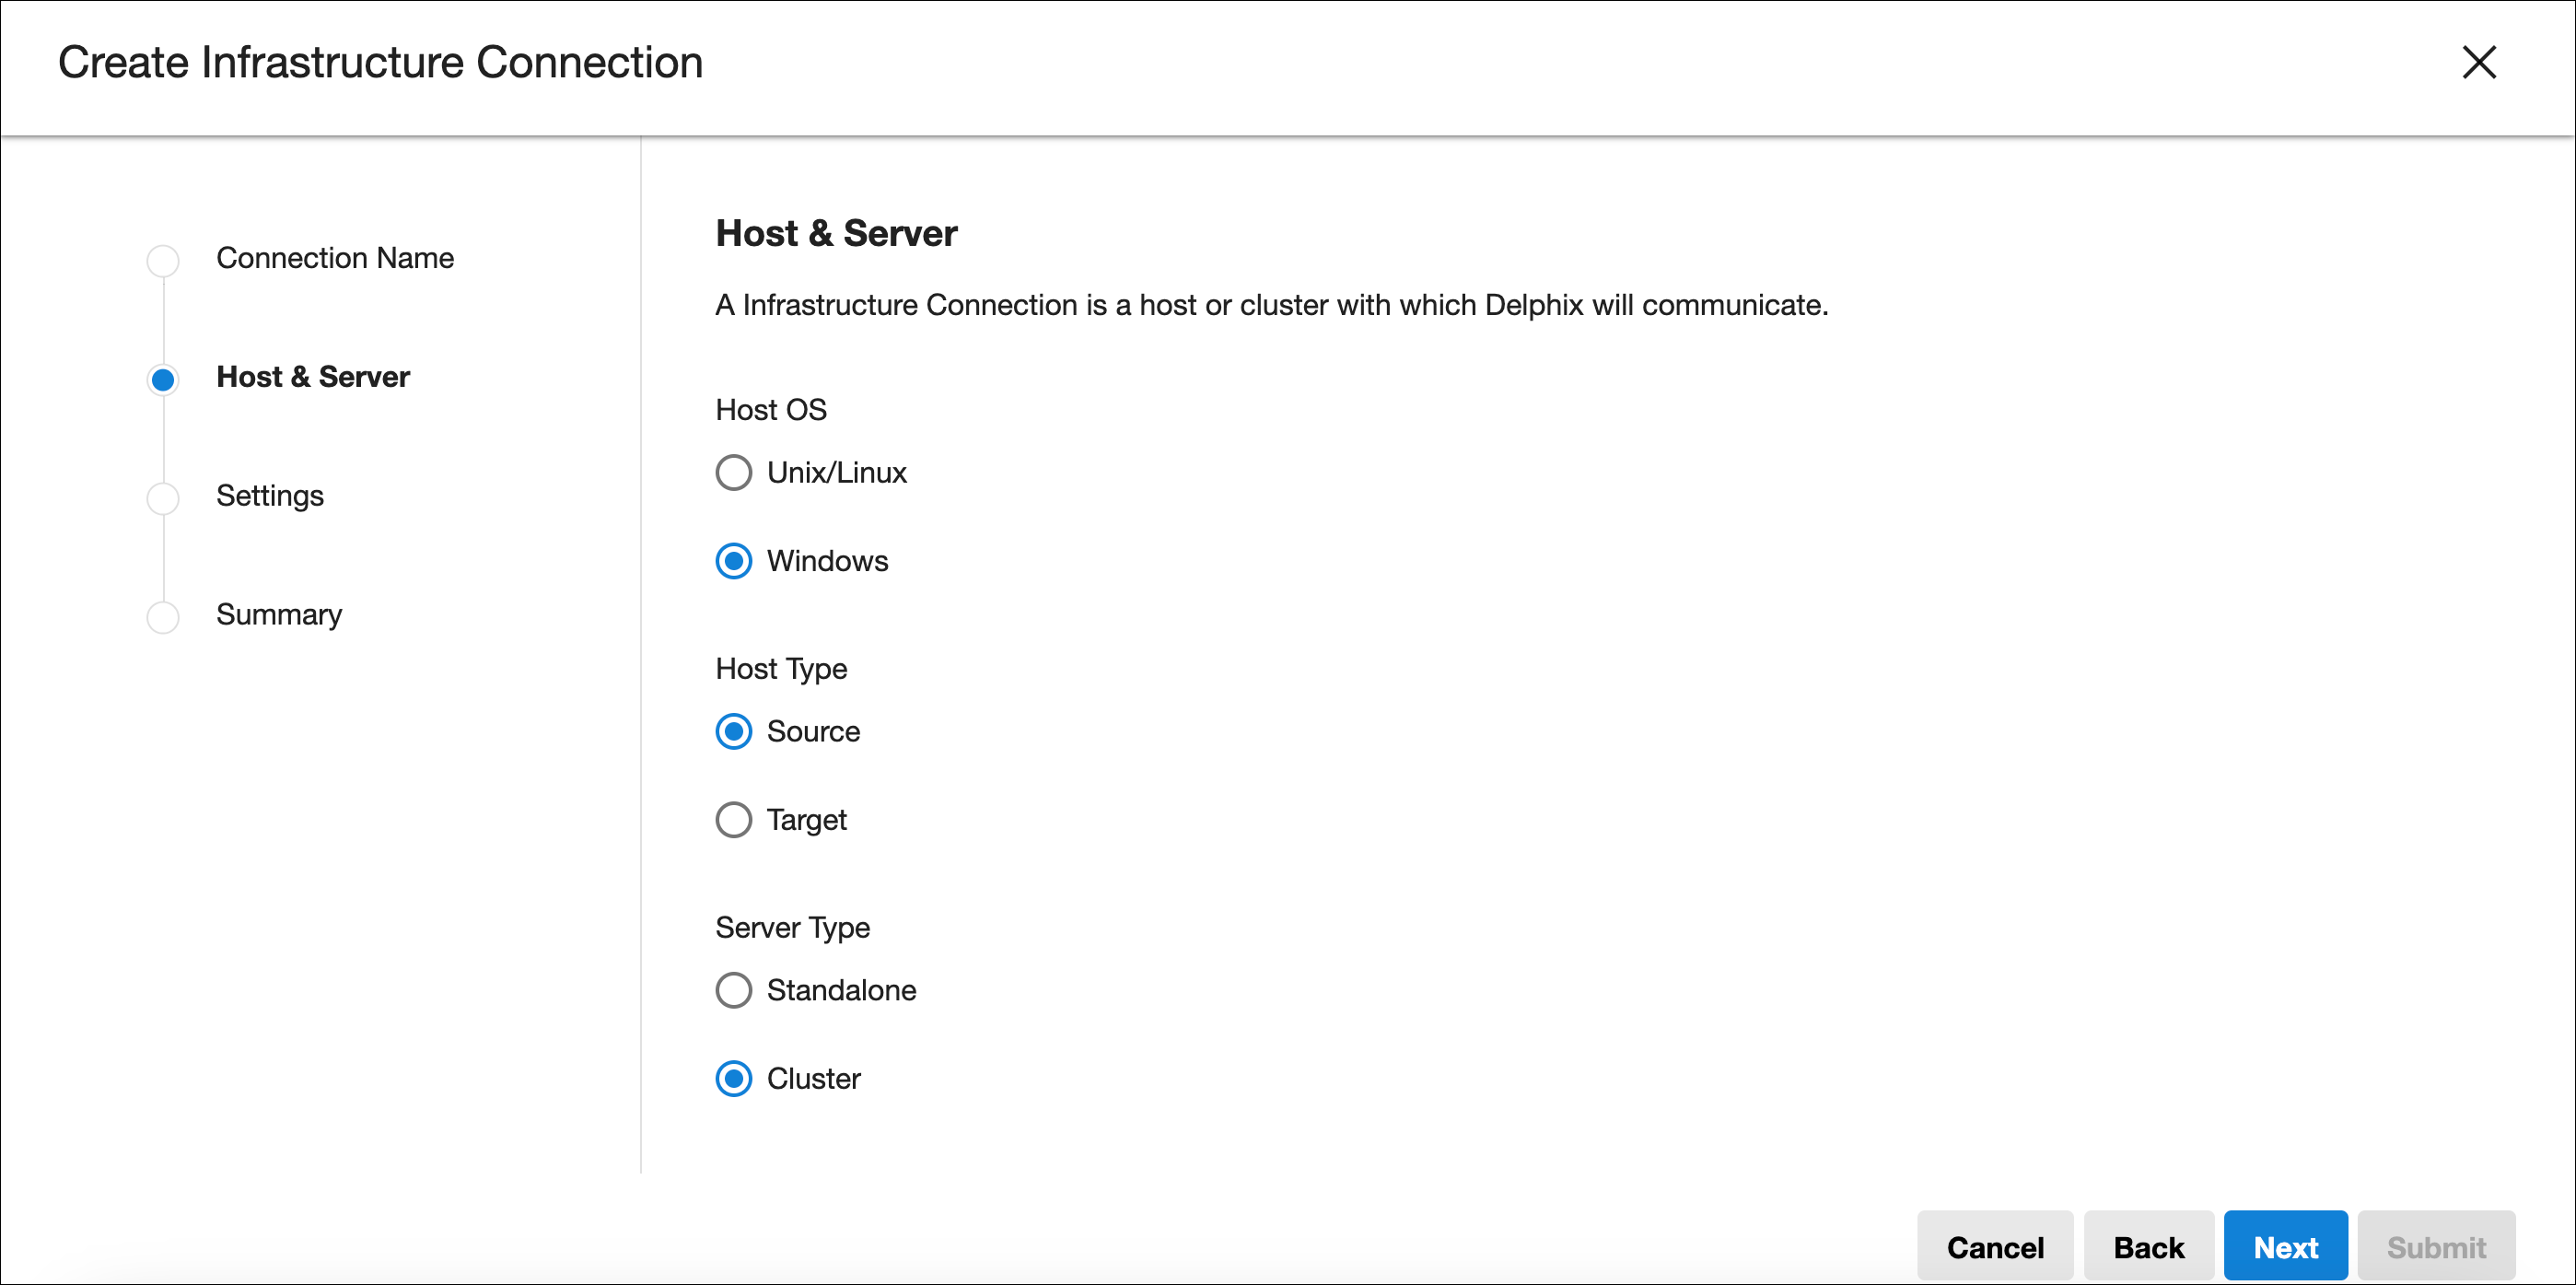
Windows
For Windows/Target/Standalone settings, a Delphix Connector download link has been added. Unlike the engine, this link makes an API call to authenticate and download the connector exe file.
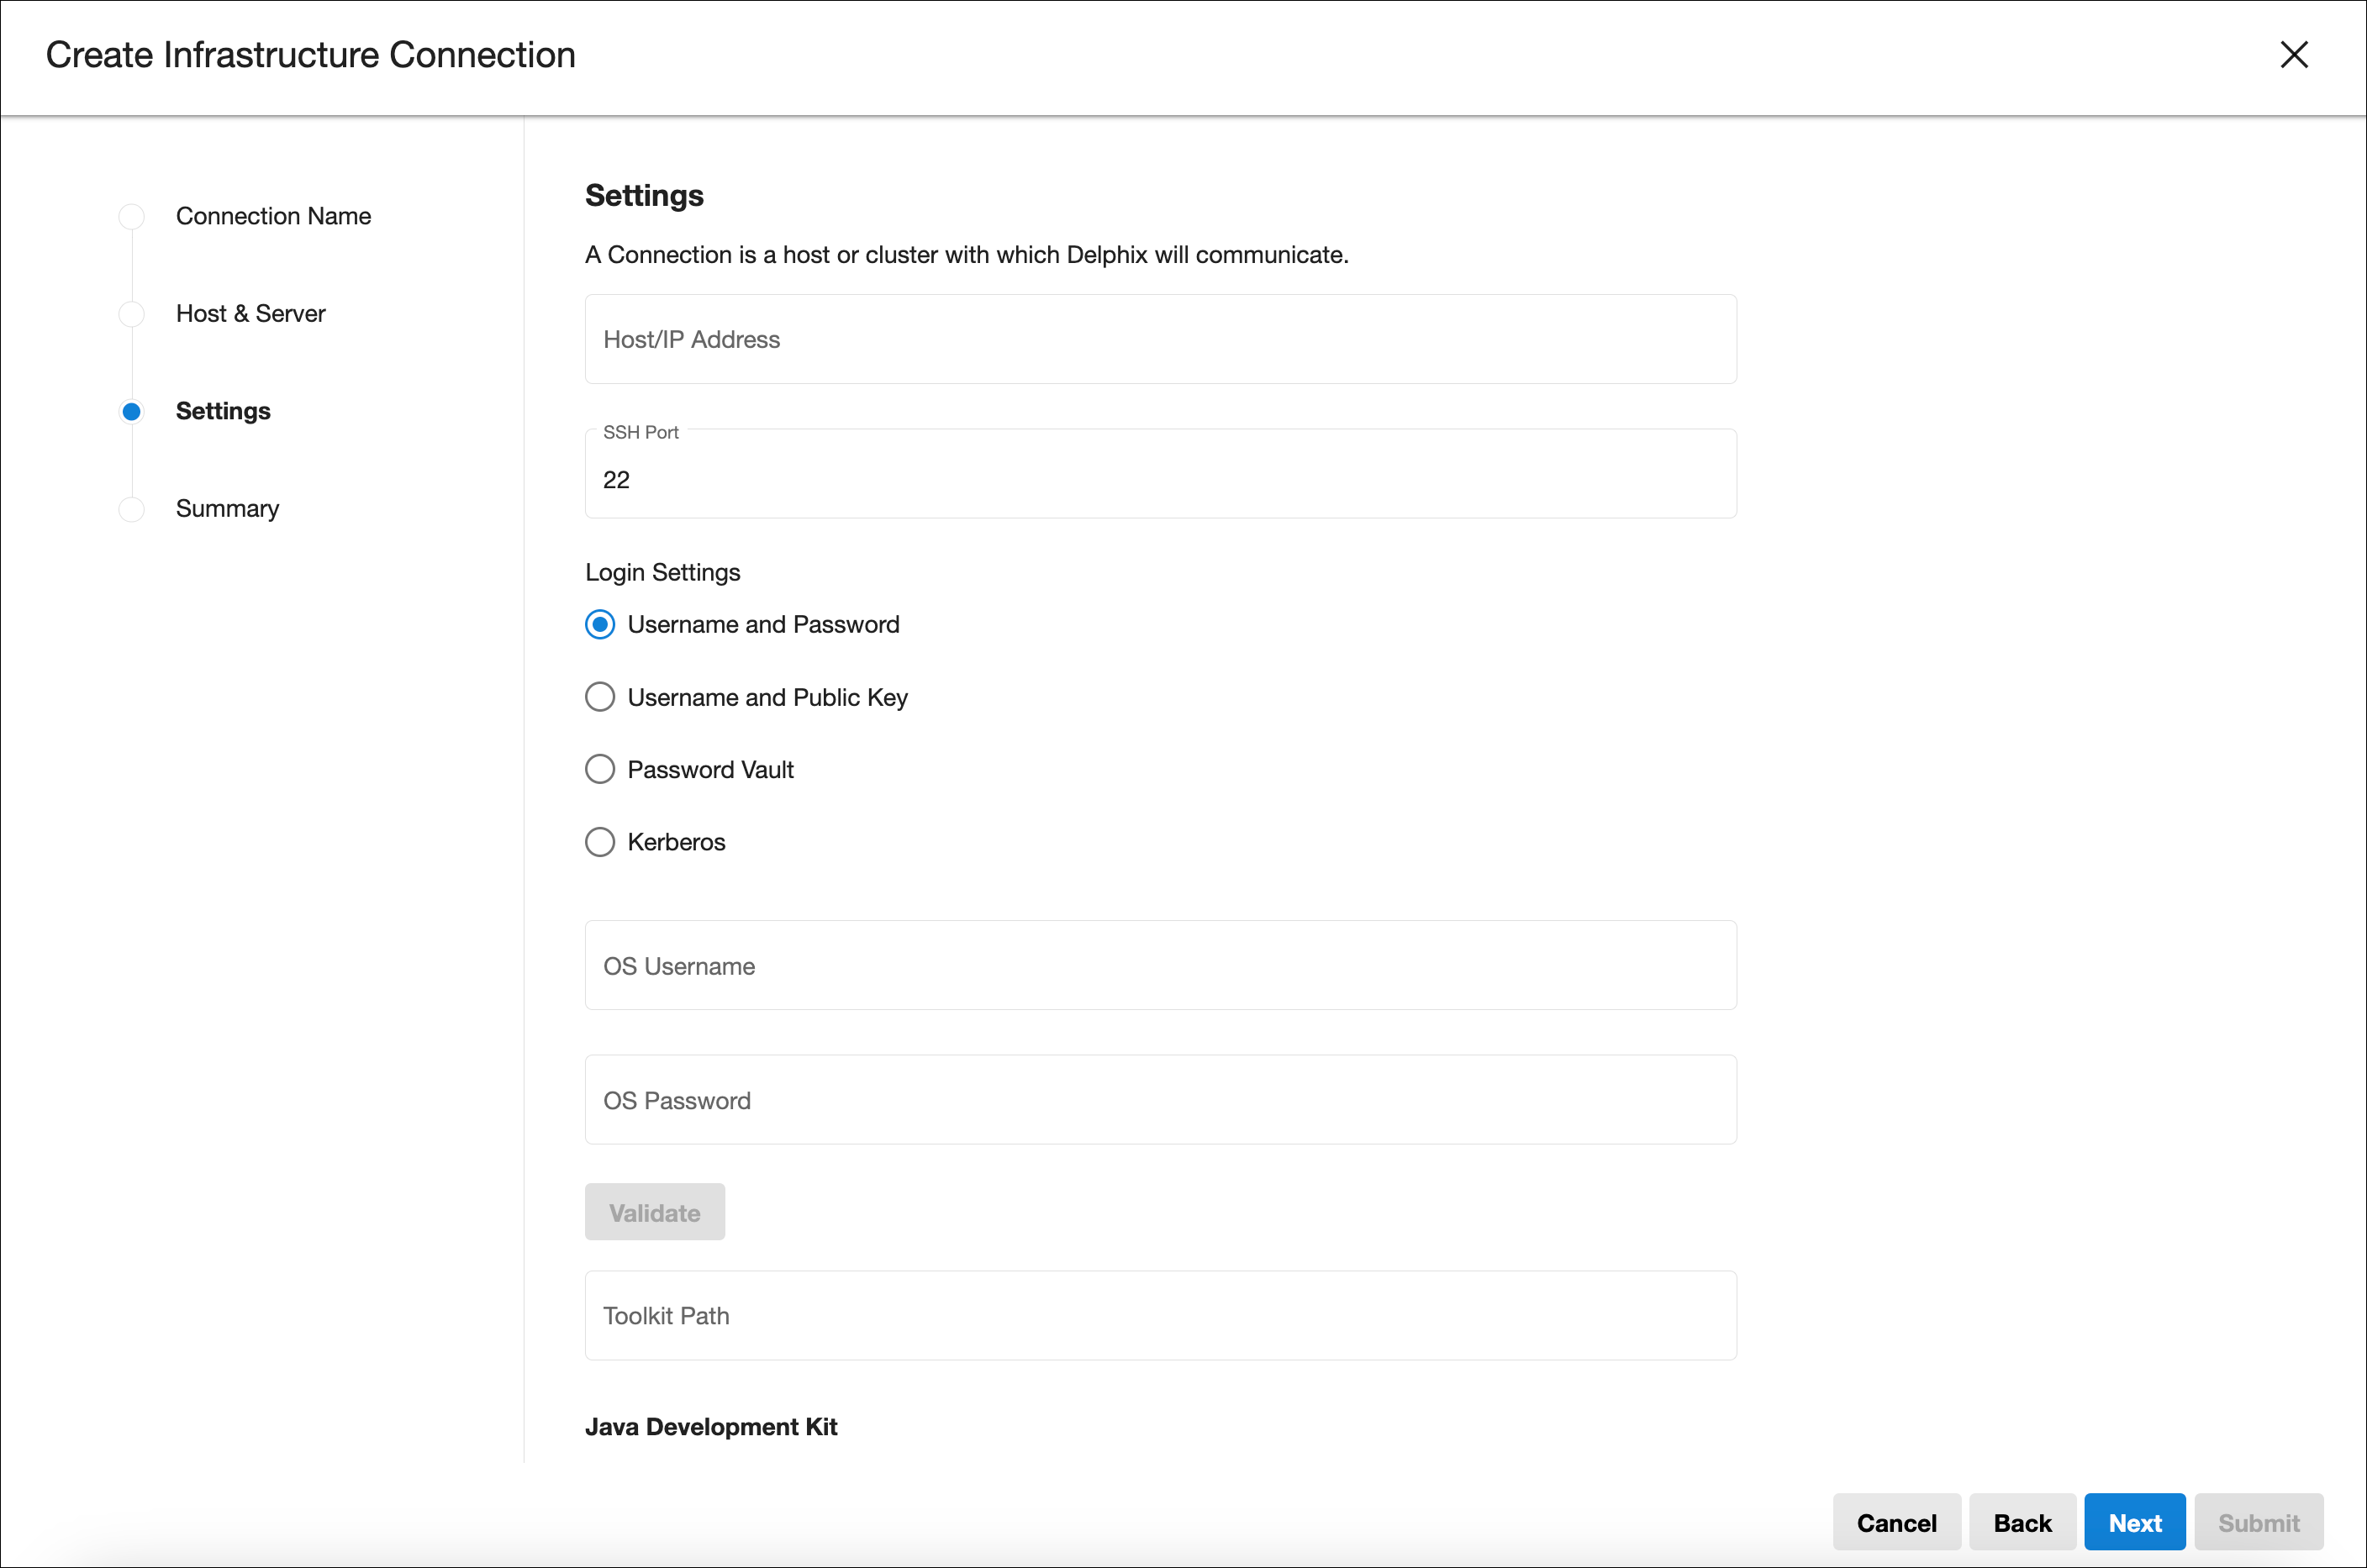
Settings
This step includes various connection setting options from basic items like the Host/IP Address and SSH Port to advanced items like Discover SAP ASE, Provide my own JDK, and Set NFS. It includes a Validate button to help confirm the environment user and prevents access to the next step if the credentials are not valid.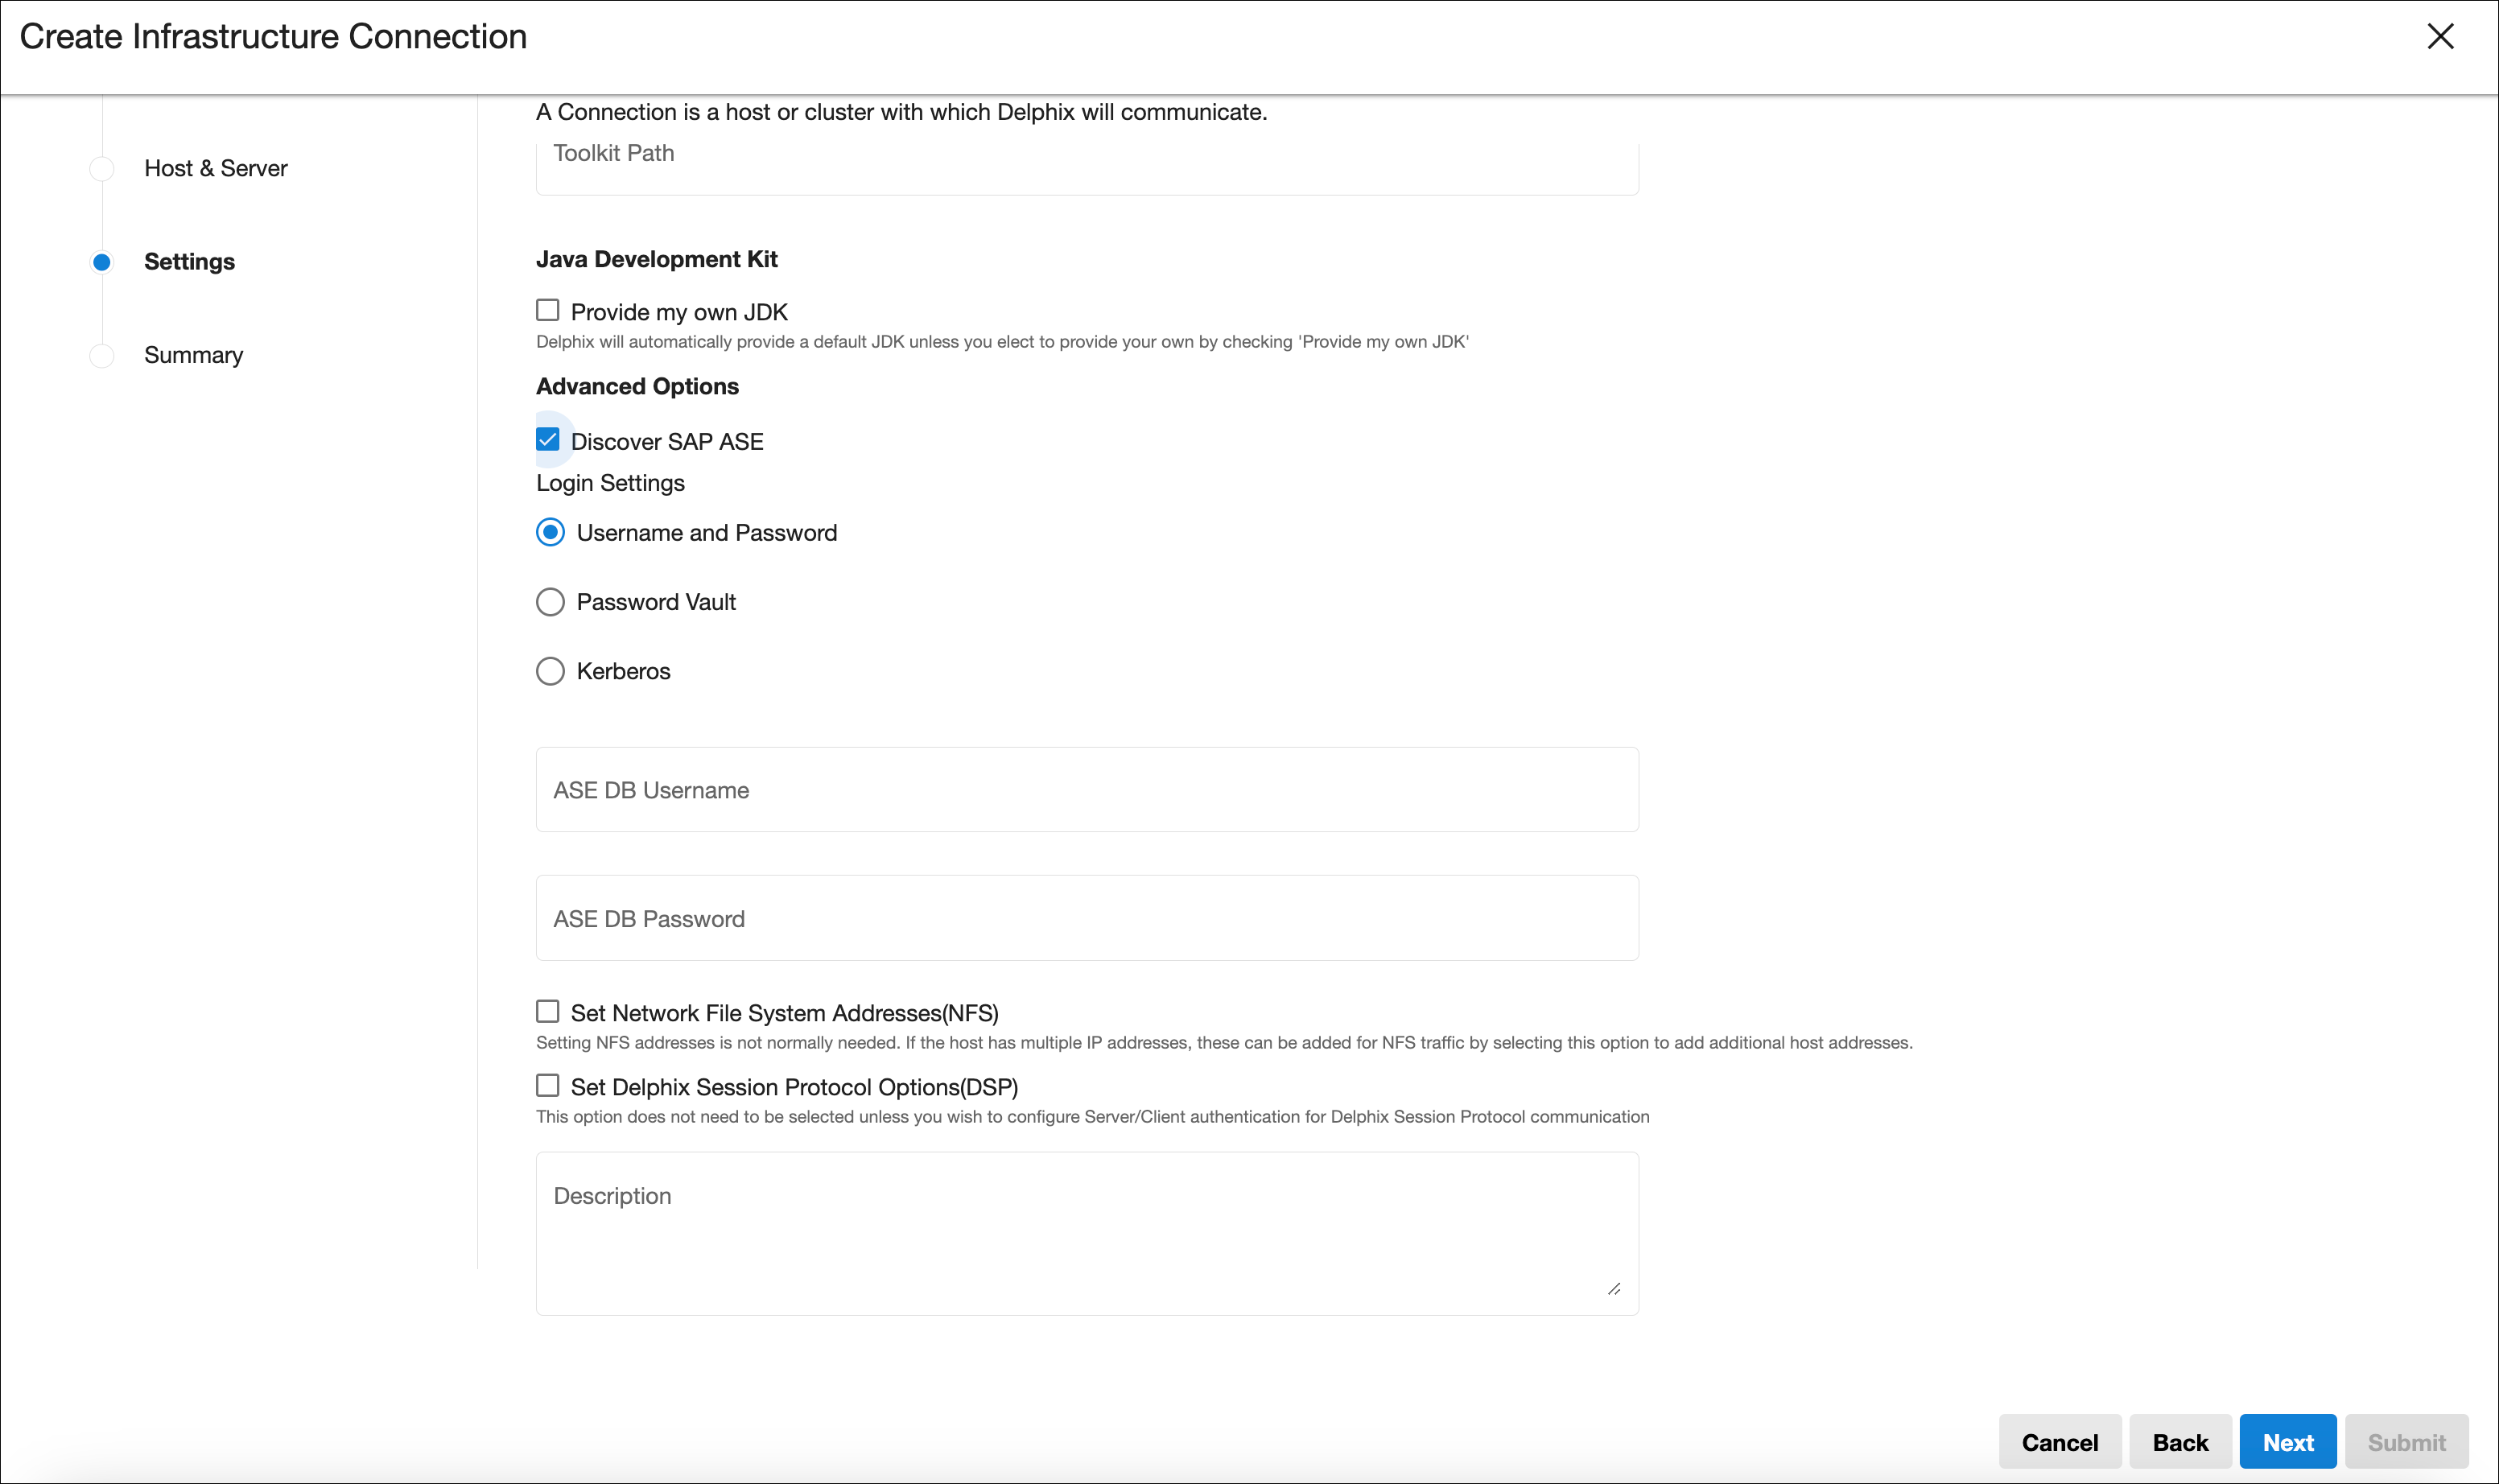
A wide range of Login Settings are available for the OS user and to Discover SAP ASE (if applicable), like username/password, username/public key, Password Vault, or Kerberos.For vaults, HashiCorp and CyberArk vaults are supported.
The Kerberos login option only shows up when the user selects a Kerberos enabled engine as the target for environment creation.
Java Development Kit (only applicable if selected in Settings)
Set the custom JDK path in the corresponding text field.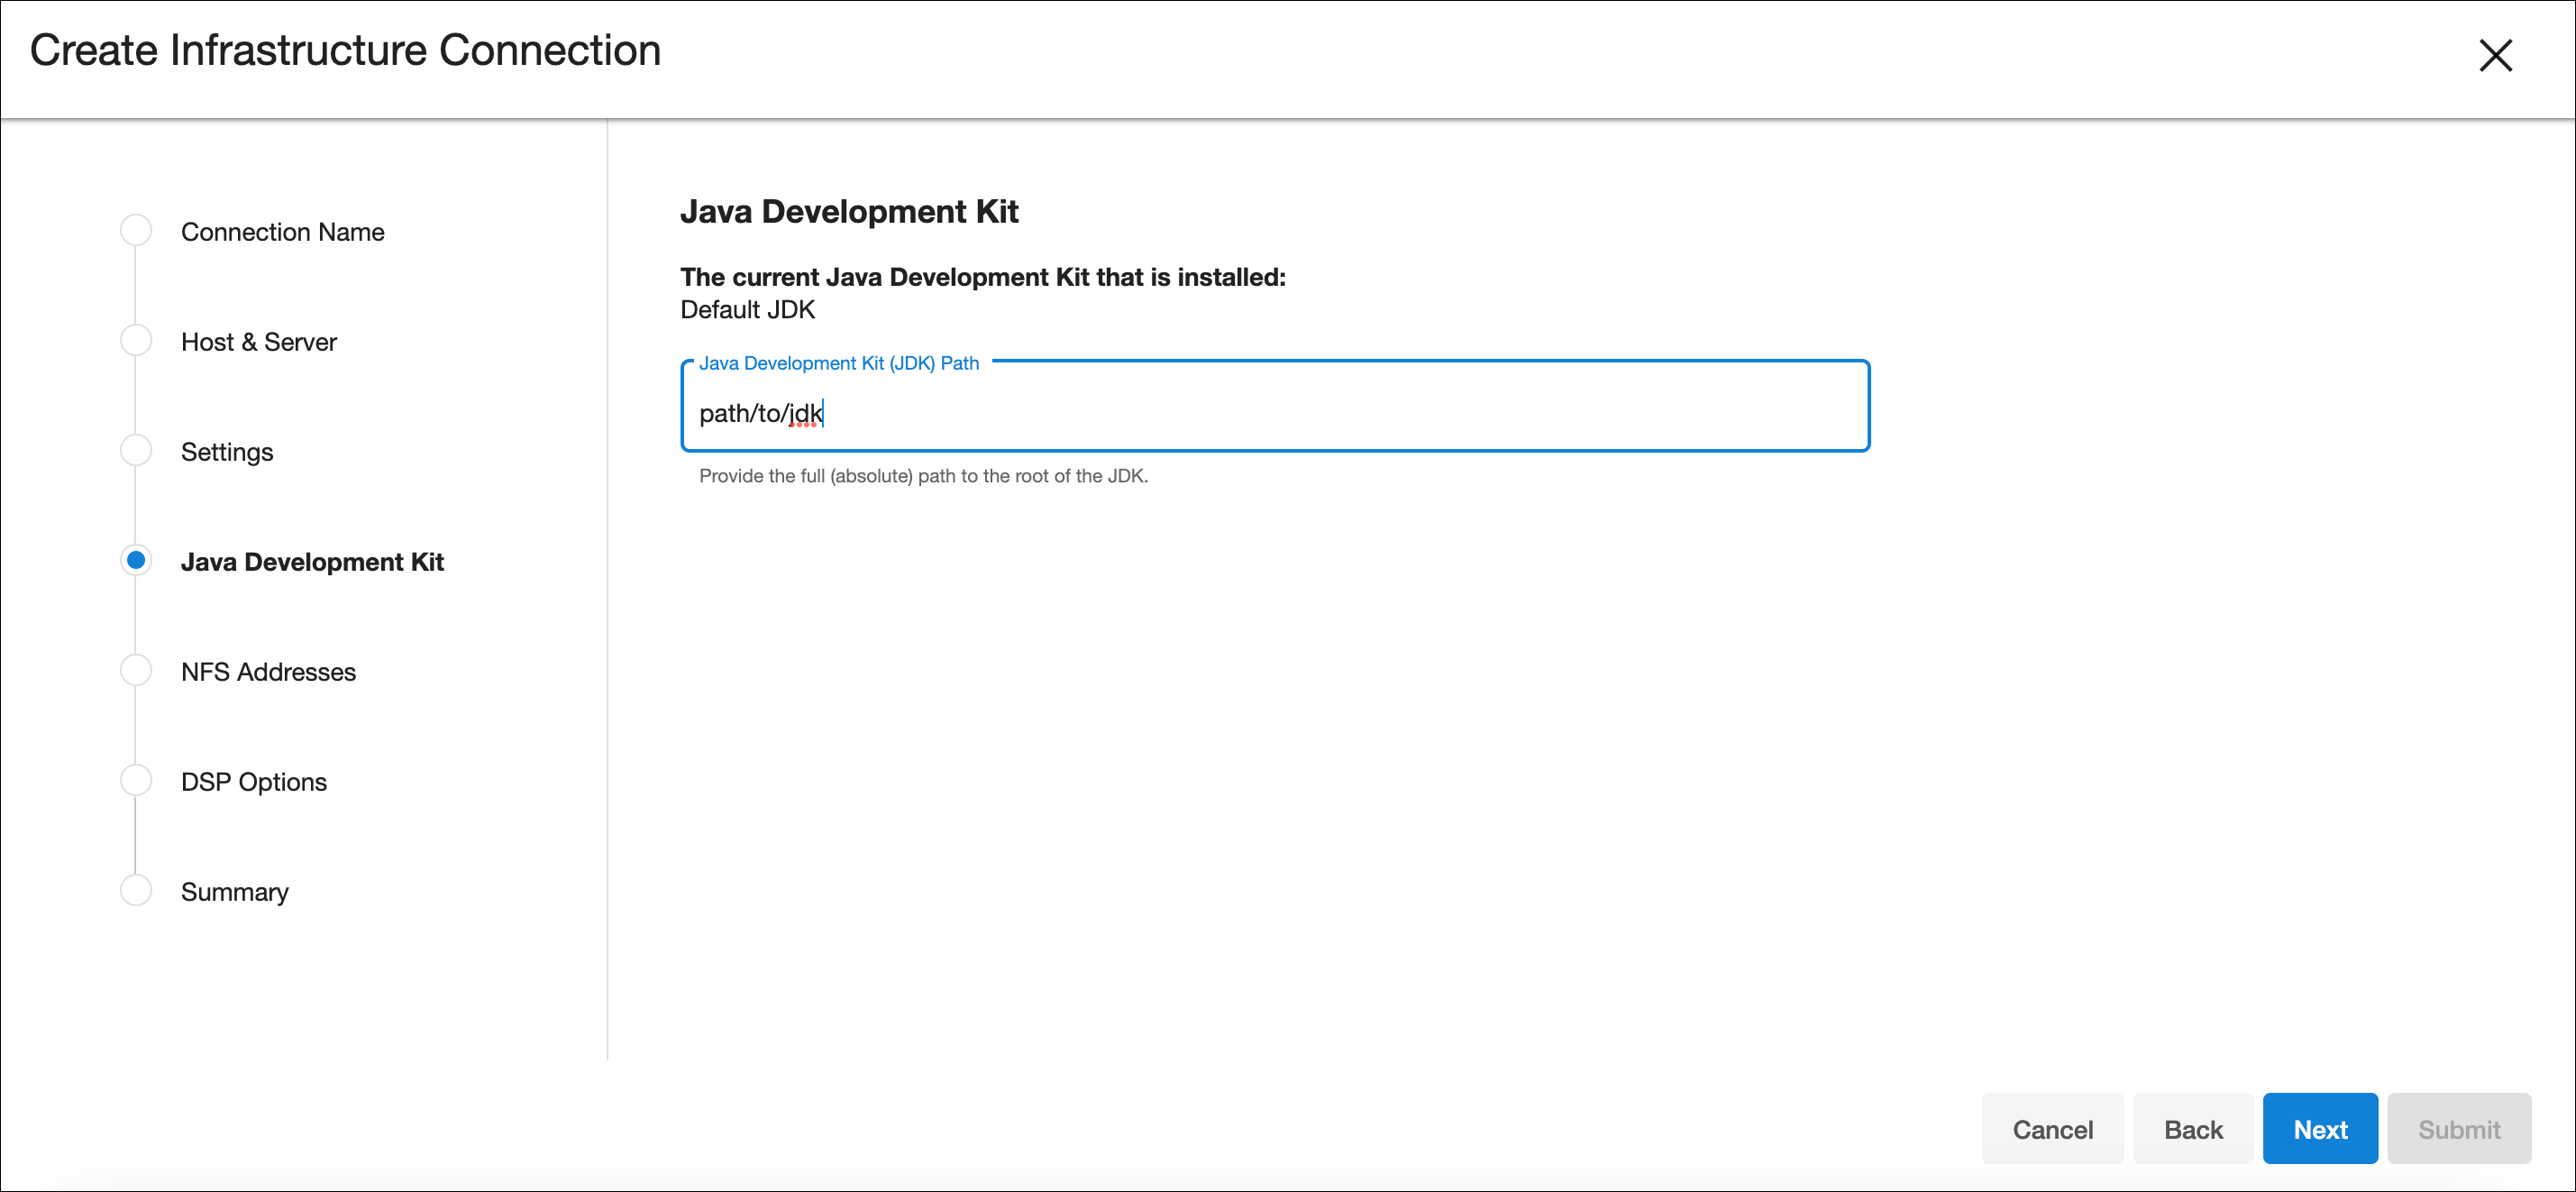
NFS (only applicable if selected in Settings)
Set NFS addresses in the corresponding text field (comma separated).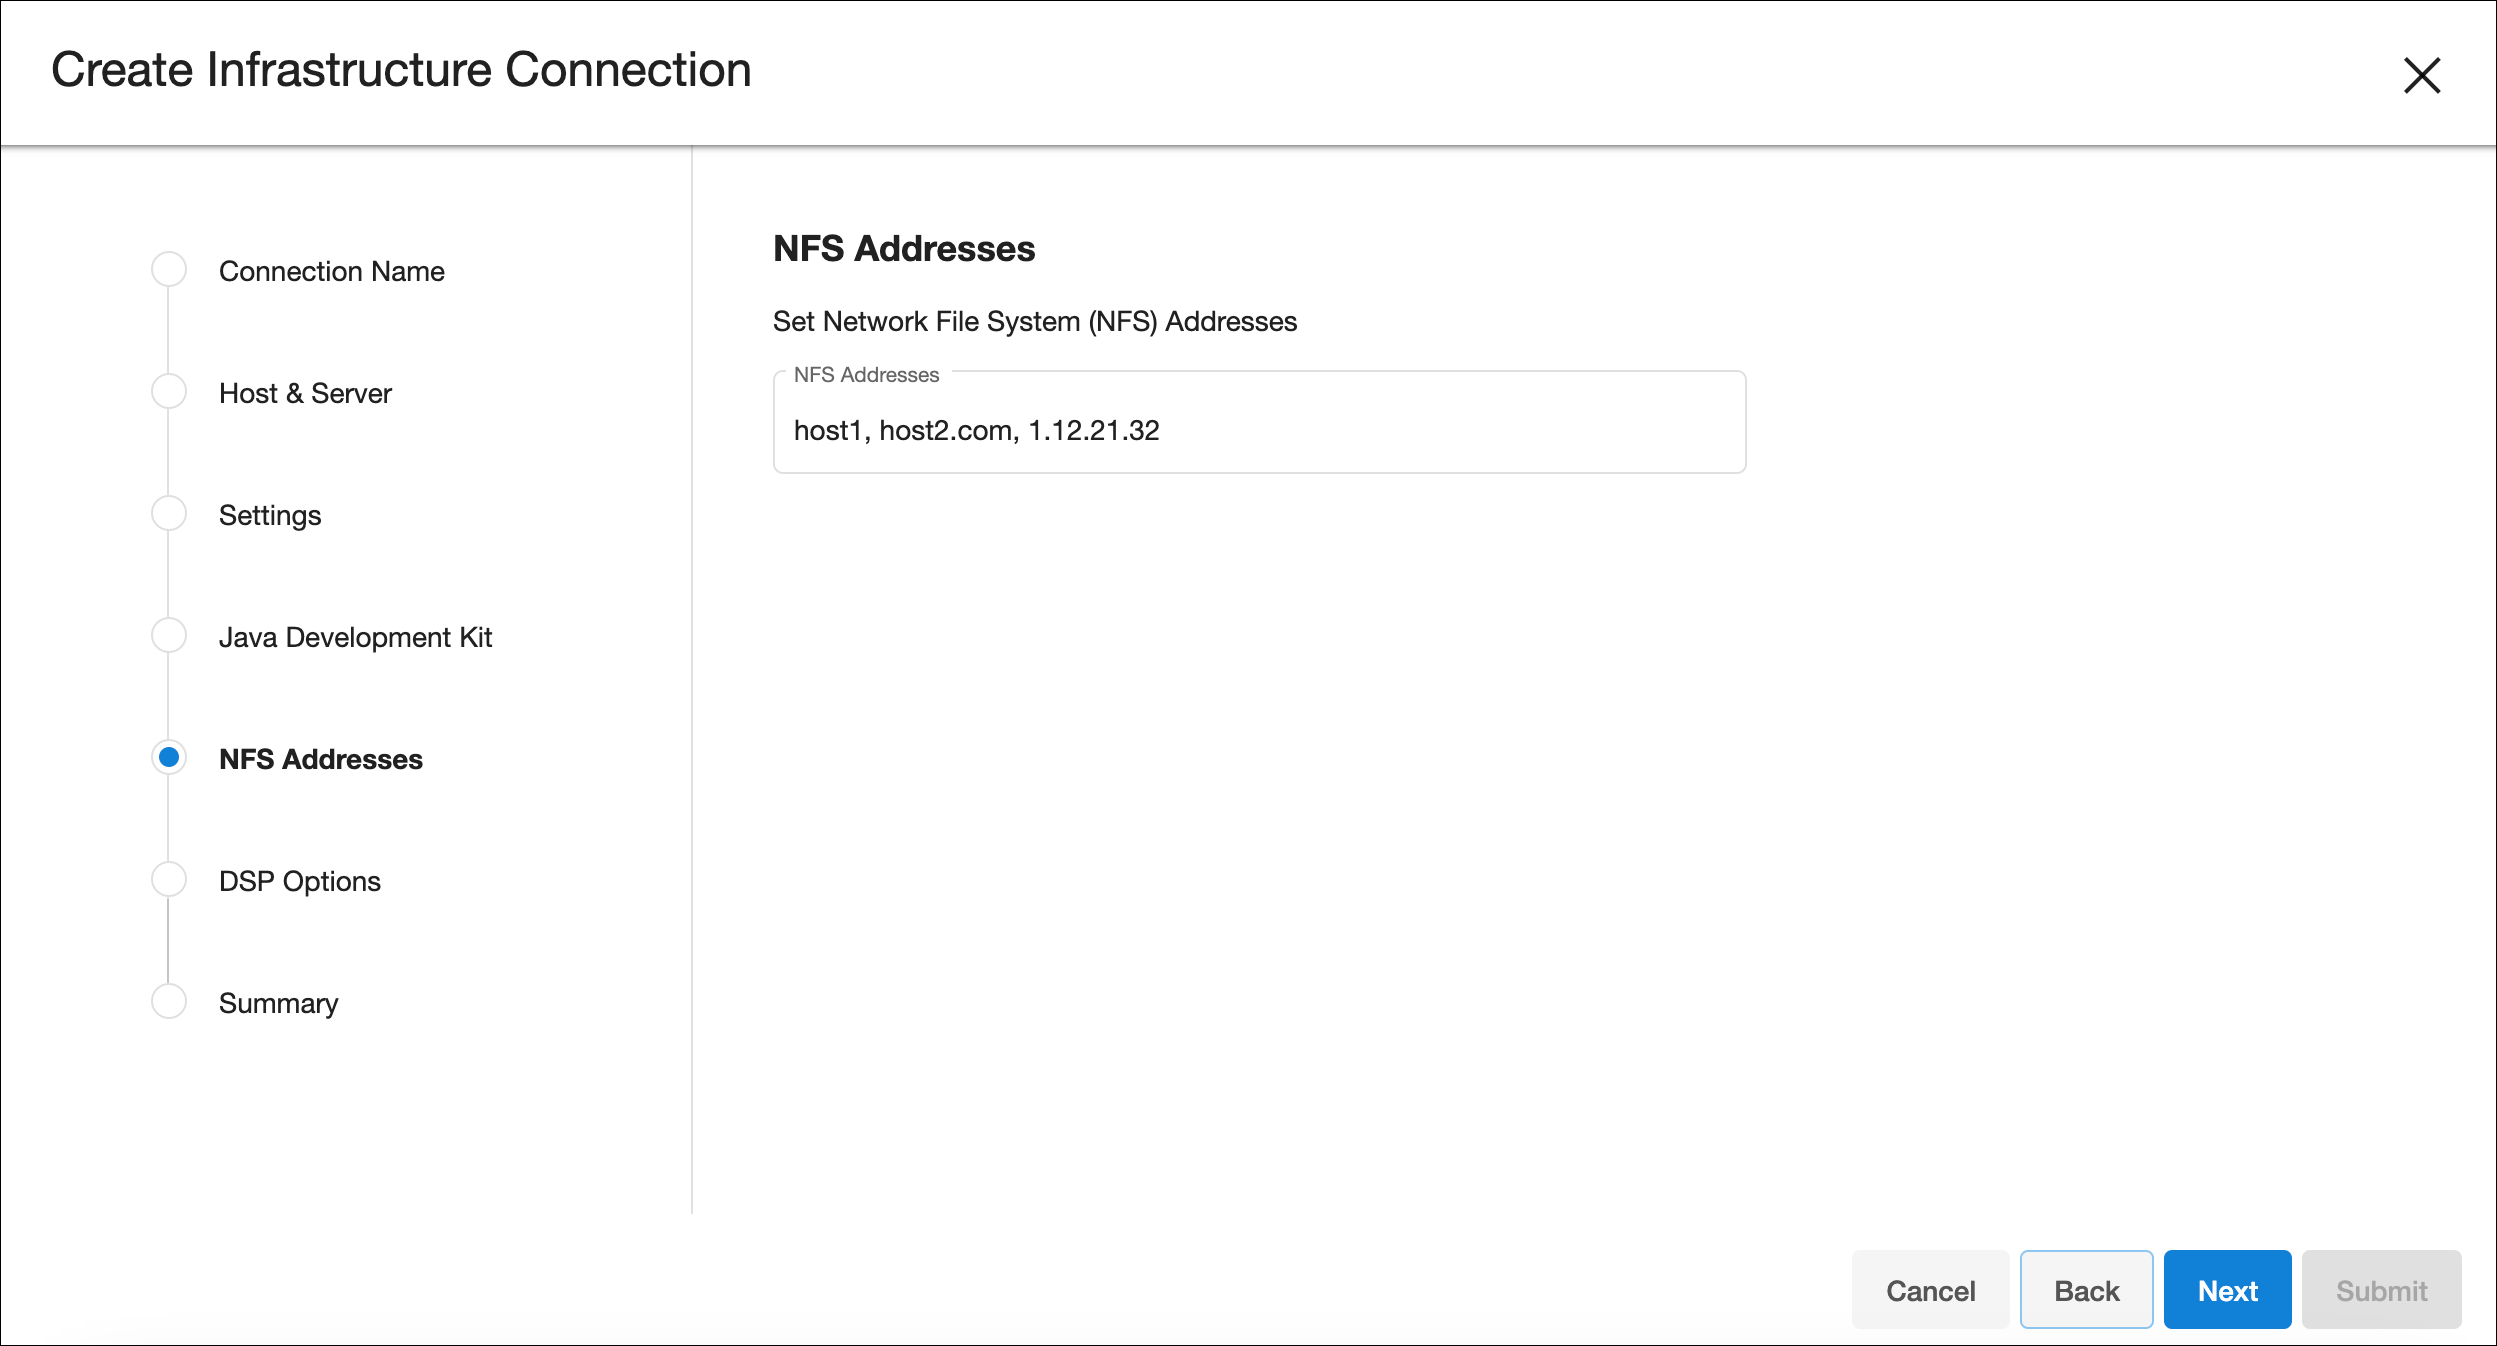
DSP (only applicable if selected in Settings)
Set DSP configurations in this step.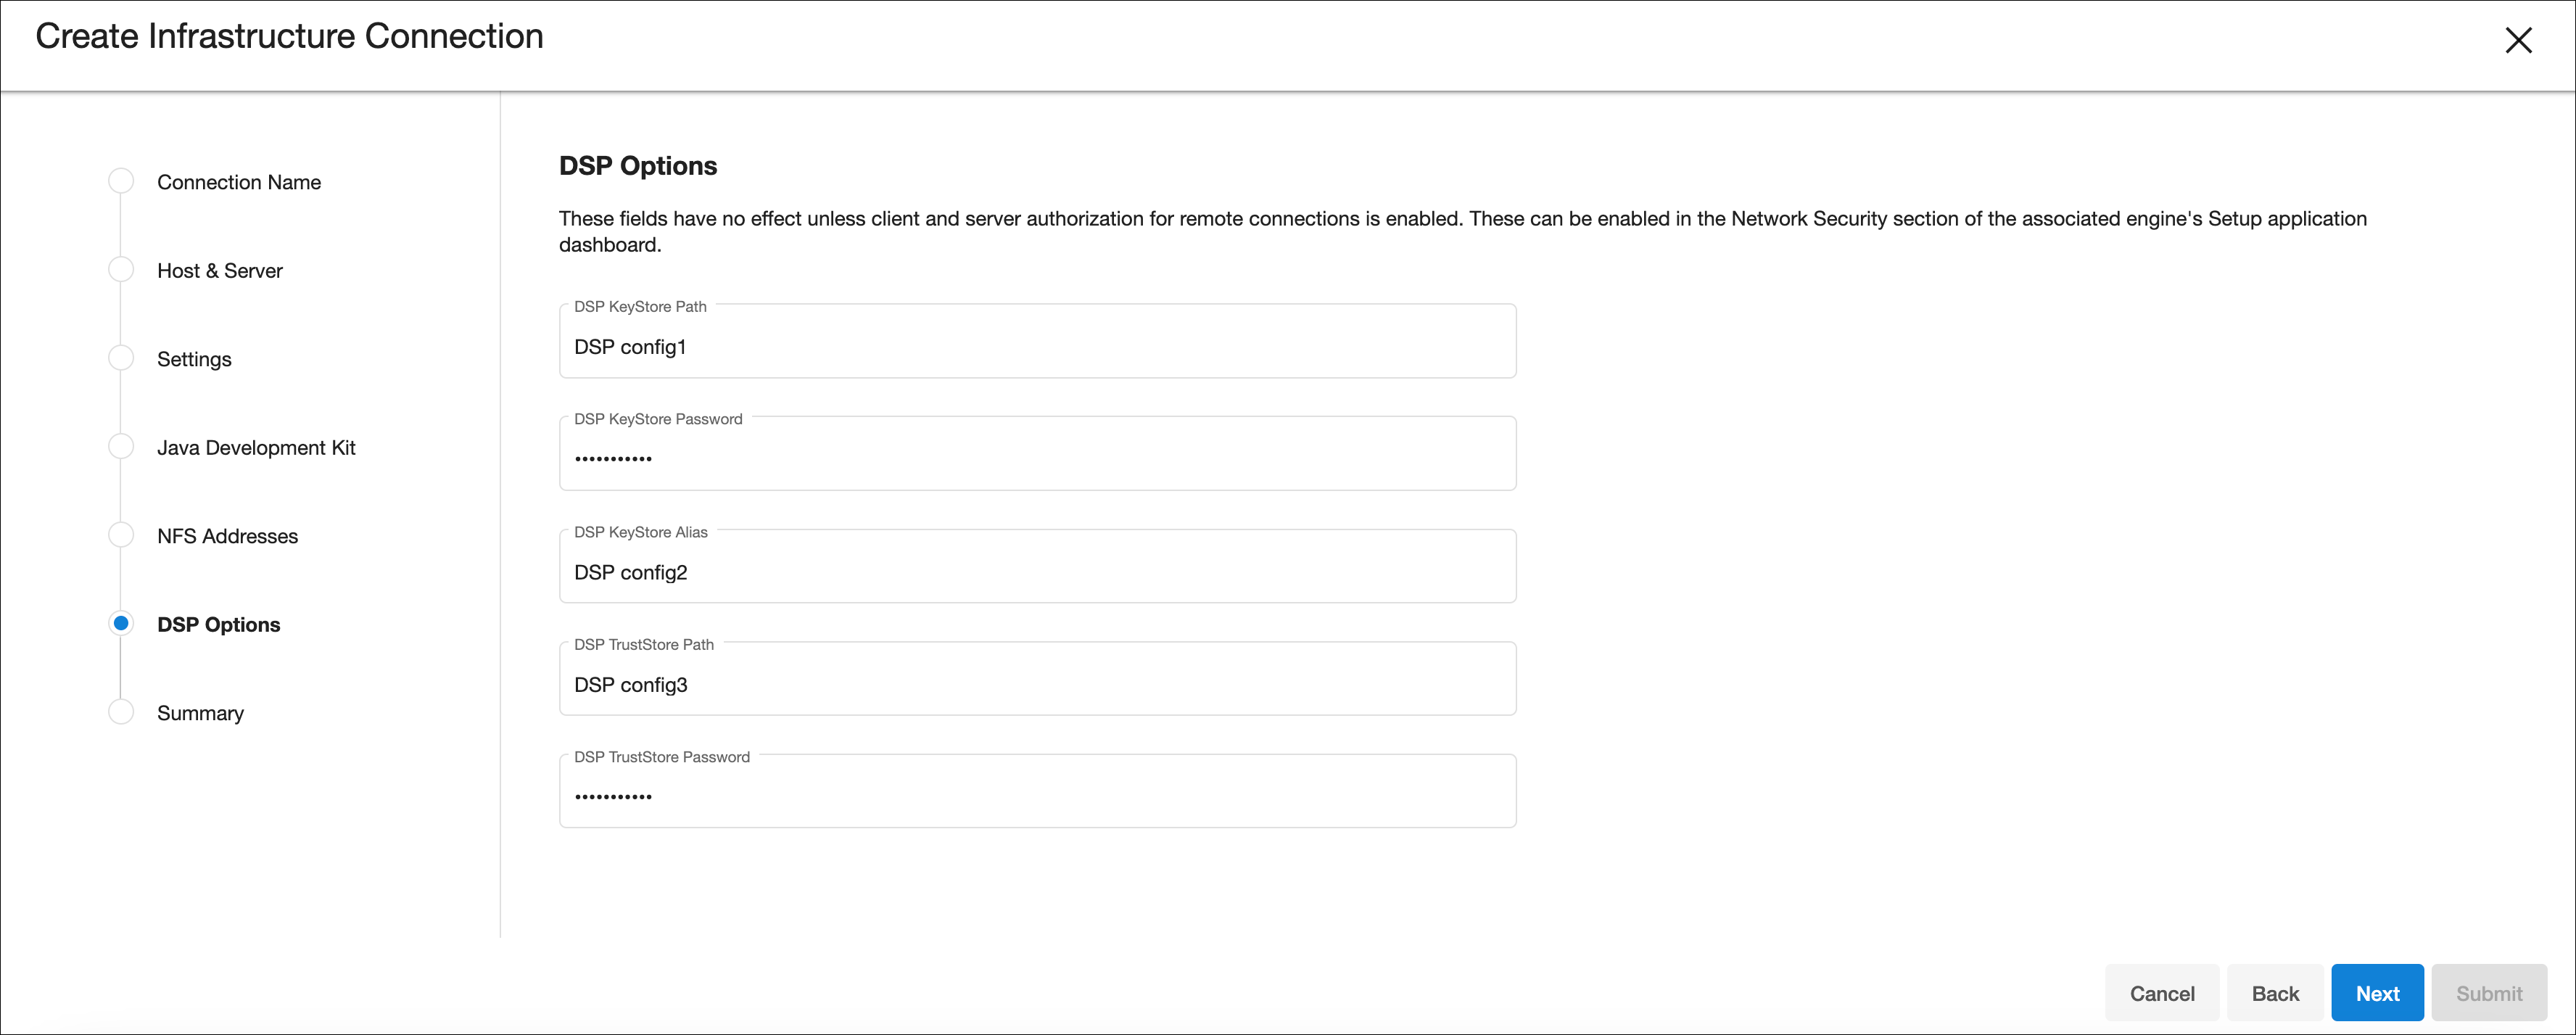
Summary
Shows a comprehensive summary of the selected options in the previous configuration steps. Shows the type of login being used for both the OS user and SAP ASE (if applicable).